Saturday, May 28, 2011

Dilapidated Ductile Duke Dilemma! A challenge! :)


This post is more suitable for Halloween.. welcome to my house of horrors! Mwoohoowowowowaaa! Back when I had a day job (corporate f/t), 2006, I had invested in trying out this OTHER shrinky process of shrinking rubber (http://www.pinkhouse.com/ ). I was pretty jazzed about the possibilities! It was an expensive (pardon the pun coming up!) flop… ;)

I had the mold sent to Pink House’s master mold maker/life caster Mark there. He did a trial with it and just couldn’t get the rubber to work in a mold designed for rotocasting. It really needed to be slathered in. I decided to try it anyhow because the main concern was even shrinkage. And as you might be able to see – the variance in shrinkage % between the abdomen verses the extremities is quite noticeable. Enough that trying to make a new mold more friendly with this media was pointless. AND of course most know the end of the story anyhow in that the cost of laser scanning decreased a few hundred dollars so I jumped on that instead for dinky duke.

The challenge here is that I’ve had Ductile Duke flopping around my studio for years now. I’ve been trying to think of a fun thing to do with him for my vending area at Breyerfest. Sort of giving him a bit of mascot role.

To make matters worse he is STICKY! And sorta heavy (so, for example making him into a hat accessory… not so appealing). Things stick badly to him, for example the white residue there is plaster (and he was greased up!) for when I tried to make a cheap/simple mold of him… he’s been subjected to a few experiments and really needs to be spruced up! He’s too fun to toss! :D

Help? Anyone??? :D


It dawned on me today to listen to ideas & make a contest out of it – I’ll give a medallion (any of mine, past or present I can spare one!), to the person who gives me a feasible thing to do with this .. rather gross looking fellow! :D


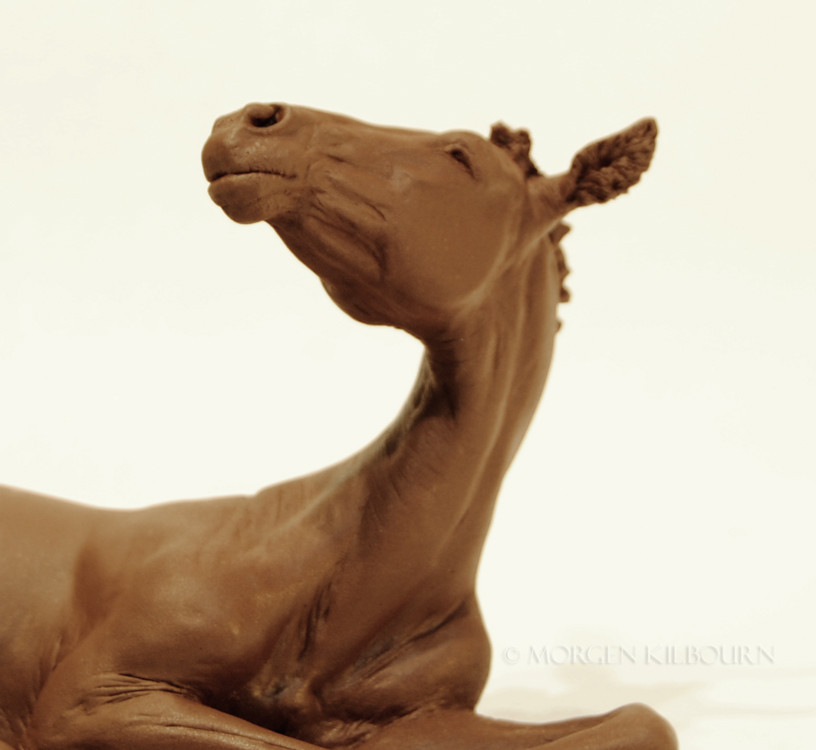
Now THIS is a flexible dressage horse eh?! ;)


Well,I'm all ears. :D artbymorgen@yahoo.com; morgen@one-horse.net You can submit to comments below too. Note that I moderate them however (so they won't appear right away - sorry!).

Friday, May 27, 2011

An example of UV damage to 1mo old resin

First – please…!

So a recent discussion on yellow resin made me think of this & I checked back on it and was shocked to see how extremely this spilt resin had yellowed in only 1 months’ time being out in the UV exposure full time.. and in my opinion it has gotten quite brittle already too.

This spill happened on Friday, April 29, 2011. The resin overflowed off to the side of the newspaper put down to prevent this exact aesthetic disaster (we say “this is why we don’t have nice things” around here a lot – mostly after I do brilliant sloppy things like this!). ANYHOW -> Unreal how yellow it is already. I’m hoping it will become brittle enough soon to chip off after a rain storm like today. Resin over porous wood is the strongest bond known to man… lol! (No but short of cutting into the wood it’s not coming out just yet). Right now it gets full sunlight for over half the day.

Compare it too to the other widget castings made that same day with the same resin pour. Those little buggers are white as snow kept inside.

And off to the right is the base of a resin that’s 7 years old and has been out in the open inside a room. Indirect sunlight of varied degrees but primarily off to the darker sides of rooms/shelves. That’s the most yellowed artist resin casting I own (now). AND I’ve had older ones and they weren’t as brittle too so again, follow the wisdom of Douglas Adams here and DON’T PANIC!

I encourage you to zoom in and see my scratching, there’s also a crack there that recently formed, I presume because the wood has bounce when we step on the step & the resin doesn’t. It’s a superficial crack but I was able to flake off around it with my fingernail. So you tell me, that says more brittle in my mind – I certainly can’t scratch off any resin like that on the little widgets that were inside. Bear in mind of course this is STRONG withering sunlight BUT it’s also been just less than a month. Well, ok, we've also had a couple of days that reached over 95degrees here & that porch gets HOT.. Still, my bet is on the big ball of blazing gases in the sky being powerful enough to be the #1 suspect in degrading that unprotected material.

Most sources say that the resin is every bit as strong despite the yellowing – I’m not willing to risk my resins yellow by storing the unpainted ones in sunny areas. HOWEVER, I would NOT personally reject buying/painting a resin myself just because it’s yellowed – I need to be SO CLEAR on that. Please do NOT mistake me there. I’d just clean it well first, quite abrasively (heavy on the ajax scrubbing) and would primer it asap. But my post here is to help spread the word to please care for your resins, primer them and keep them in places where they hopefully won't get yellowed or, more commonly an issue, heat up badly & warp over time. They're stronger than many plastics by far, and less biodegradable too. But few art materials are perfect. Resin's kryptonite is the sun. :)

Art out of sunlight is a great rule of thumb actually. Many kinds are UV and temperature/humidity resistant too. But well to make a broad sweeping generalization; That’s just ..well the nature of thoughtful art ownership mostly! :) There’s also the added step that hobby artist resin owners can take of getting their resins prepped and primered. The primer coating then helps to prevent UV damage. Painting of course is the icing on the cake! ;)

Well I guess my PSA on how to properly care for and love your resins is over and out here. :) If I ever manage to save these back steps from this disgrace by flaking that off (it's REALLY on there still mind you!), I'll be sure to share that! ;)

Wednesday, May 25, 2011

From chaos a little order...


I've blocked out the names for privacy. But the basic gist of it is
_\______________________________/__
_O_____________________________O
Buyer Name - Total $Price (varies for US vs international & some folks use discounts won or earned)

Payment history date #1 / $payment
Payment history date #2 / $payment
Payment history date #3/ $payment

Balance owed..

__________________________________

So that's my new (really pretty unremarkable - lol!) quick new thing I’ve come up with to simplify MY life anyhow It might help other folks I know with items “on layaway” (under time payments – someone just said the layaway thing to me recently and I had to giggle but it’s true!). It TOTALLY is NOT the only place I keep track of things of course but I"m so visual that I like to catalog at a glance.

So for my painted horses under payments I like to have a postit or sheet somewhere near the horse so I know at a glance when things were paid for, what remains on the balance OR -> (very often) if the horse is waiting to ship out for some other reason (people are moving, waiting to ship with a friend .. you name it!). So since there’s always a story behind horses, when you start getting a good # of them going you look around & go “I know these guys are all spoken for but what's the deal with him or her?”.

I like to group by certain statuses too. Payments coming in small frequent bunches make me want to move a horse to be easily at hand.

I note it all down on spreadsheets too but printing out is wasteful of paper (especially if you have frequent updates) and thus I came to this notion! REUSABLE little hangers. This way stickits don’t fall off (because in the unpainted horse area things are packed together tighter clearly!). Something that I can write on with pencil and erase, even reuse on future horses. And my color coded flags still apply too.

I really like the system and just had to share in case it helps someone else down the road. It’s a challenge when there are horses on payments and back ordered. But a tag doesn’t have to hang on a horse either I guess. At any rate – probably the biggest benefit is to reassure me that the shelf lined with horses IS indeed not all waiting to sell, whew! AND it also lets me know when my reality doesn’t match my spreadsheet (most often this happens when a horse is sent out as a donation or mailed the day it’s paid for in a big ole hurry/rush to the PO and no time was even taken to log it down on the spreadsheet).

Striving to ward off the entropy any way I can! :)

Tuesday, May 24, 2011

Functional art for sale! :)


I do so love to make functional art. One of my favorite things to do was make the famous "horse butt" (looped tail for a handle) coffee mug in pottery classes & situations when I had to come up with an idea for making earthenware. Not original but fun as heck to use too! :D

Anyhow, so today I released my latest work Gleep. You've seen him here last year, around this time actually (!) mid-May, I started him (somewhere inside the original is a jelly jar lid!) . He's actually been completed for a while but it took some coaxing by Lauren and Jenn to cast him. Relief works can look so odd without color, I'm exceptionally full of the warm fuzzies that these ladies brought them to life so to speak & are doing a couple more!

In the meantime, the page is here; http://www.artbymorgen.com/gleep.htm

Here's the real Gleep putting his beggar face on;


So yeah, the real guy is still cuter but he's sure fun to paint! :D

Friday, May 20, 2011

Articulations from the inarticulate


Something else I’ve been making whilst on the phone. I can’t type, read and because of my phone reception (lack thereof!) I can’t go far (very few places in my home get reception well enough to tak for long periods of time on the phone)..sometimes soooooooo a lot of projects here are borne out of grabbing what’s at hand. This is for a book I've been picking at for 3-4 years I guess now.. (lots of illustrations examples needed so don't look for it anytime soon either!!). :)

So in this case this is a photo I took from Stoneybrook Steeplechase that I’m converting to show skeletal articulation points. Kinda a fun effect to share. I have little else new to share here except a lot of painting projects I’d rather wait and photograph properly. But I grabbed this again for a bit today & thought to share it here… for lack of having anything else to speak of! ;)

Next week I hope to be ready to show something actually for sale again though! ;)

PS - don't look too closely at that overlay of the skeleton! I've got to redraw (I do the drawing the old fashioned way with a pencil), and there's even two tail bones in there where I was fiddling around! (nevermind missing bits of bone). Still, the gist of "find the point of shoulder & stifle" come through... enough for a teaching tool if needed (this summer - until I have the time to draw the rest properly) so yay!

I heavily watermarked since it's an inprogress thing... don't take this one! lol! It's not 100% correct! ;)

Monday, May 16, 2011

Preparing for a fun all ages workshop this summer!


It turns out that everything fell into place for me to go to Lexington KY this summer again to attend “Breyerfest”, a 3 day extravaganza of horses and all things horsie, for all ages. I’m going to be teaching a workshop there and will have a booth Thurs, Fri, and Sat nights at the Artisan Gallery held in the hotel formerly know as HIN.

So for the workshop I’m tasked with teaching malleable young minds to sculpt horses in a mere 2 hours. The kit is actually pretty comprehensive and I’ve seen some impressive results from it. There are of course really tricky aspects to sculpting, things that artists often take for granted until they try horses… and of course I’ll never be able to cover everything.

Thus the aim will be to find a way to inspire and teach kids what tools work for learning.

As to being inspiring, I figured it was only fair if I tried out the kit myself first. Believe it or not I’ve never sculpted with Sculpey (nor Gapaxio nor some others – Apoxie Sculpt gal that I was!). Anyhow, so this was my one off interpretation of the horse in the book with a head tuck and very very minor leg deviation... and of course a whole different build. Because the point being "all horses have the same build no matter how big or small"... and proportions not so different after all (although a little - even armatures rarely need to be modified). Weighty topics eh? lol! (I'll have to try to be a bit more fun that than I'm sure). ;)

Anyhow, sooo… if you look closely at the 2nd picture here you can see the cooked flesh coloring of his hocks. I have lots of friends who use Sculpey and I’ve seen these macabre overcooked bits hanging around in their studios too… so at least the playing field is leveled somewhat in that I can tell the kids what not to do (good god whatever you do – believe people when they say NO to the toaster oven concept… I have a friend who can pull it off but only because she’s doing tiny heads in there… fire danger yikes!). My favorite is how it bubbles when overcooked. I’ve also undercooked it so far. Good times!

Meanwhile, I did try to create a horse that matched the pose of the book.. which a fairly simple modification to make it more Fairytale Friendly! :D

To me it strongly resembles two well known artist resins, my fiancĂ© disagrees but well, I dunno. Cantering in static, stand alone positioning only leaves a few options for poses. The armature is a bit thick so I went with the heavier horse. I can’t decide if he’s more Shire or Friesian. ANYHOW, bottom line is I may leave the off side undone so that can be see “in progress” too for the attendees. Obviously if it took me a day and a half to make that I can’t possibly expect anything much in the course of a few hot and sweaty hours! ;)

I’d love to hear any suggestions from past, present and future Breyerfest workshop or other sculpting workshop attendees. I’d really like to make the most of 2hrs and supporting materials, while not being overwhelming.. and not being toooooo dry or too flakey. ;) I have so many ideas for them, yay! Love having fresh young minds to convert – opps! – I mean mold! ;)

********10 minutes later adding this in... *********

OPPS! Ps to all this... as I was looking at the uploaded photos I realized the 2nd armature wasn't bent yet fully.. (back hocks not "added" yet, had to bend those in to match the pic in the booklet)... truthfully I literally just popped him out of the box and put him down next to his more mature brother. ;) Bent his head under, moved his legs just a tad and mostly to make him stand and snapped the pic.

Friday, May 6, 2011

"Little Man Mango" wrapping up...

Added Mon May 16th! Opps! I thought I updated this post a whole week ago. Maybe it didn't submit properly. Anyhow, well Little Man Mango reservations now up being taken, details on my website. He's only available until June 7th (3 more weeks): http://www.artbymorgen.com/lmmango.htm


A favorite angle.. I feel sleepy like this myself! In the enlargement you can probably see his sleepy eye lids - actually very easy to find references of all kinds too. Lots of tired babies out there!!

One week later and I’m ready to start down the homestretch with this Thoroughbred colt! Ok, sorry, Derby fever over here!

I’ve spent the majority of the past week adding the rest of the feet and legs to this colt. If you compare with my last post you’ll see that the bottoms were shorn off. Since I initially started this sculpture last month in fun I didn’t want to get the piano wire out and try to pull him up, put in more underneath & create the bottoms of the legs. It wasn’t that hard to be honest to do it post-casting… just a lot of detailing/smoothing out.


I think this is is one of my favorite shots for all the fun details I got to pack in because he's all scrunched up.. any second though he's going to tip over and stretch out again however! ;) Ah but no seriously, you can see a lot of the detail in the enlarged pic. I'm still not happy with these shots. Lighting either washes out detail or hides so much in a work like this where there are nooks and crannies like this. Back into the photo studio!

Now he’s gotten every little divot and detail addressed. I confess I give these production master sculptures a wee bit more of a once over when the primer is fully dry. This prevents things like ‘dusty’ or gritty details in areas like the nostrils. So what the casters generally get in a master isn’t as photogenic, the primer is buffed here and there and not uniform in color (but smoother than sprayed on primer is).

At any rate, so I have that to do this weekend – but first I need to get the final ‘product shots’. I haven’t picked a day to release him but it will probably be next week. I’ll be informing my yahoogroup first. They will certainly be the first to see the final albums! ;) But here are a few shots for my loyal blog readers in the meantime!!! :) More next week..

Added in Friday evening...One last pic for today;